Coil Inserters
PBS 2600 TCB –
Total Cut & Bend
Dual Sided Crimping Unit
for coil diameters from 6 mm to 50 mm
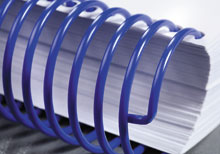
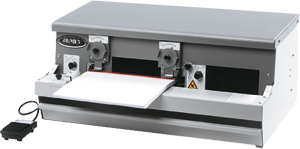 The TCB - Total Cut & Bend with its
patented design can cut and crimp the
full range of plastic spiral diameters
from 6 mm up to 50 mm - with the
same crimping heads!
The TCB - Total Cut & Bend with its
patented design can cut and crimp the
full range of plastic spiral diameters
from 6 mm up to 50 mm - with the
same crimping heads!
(U.S. Patents # 7,731,468 & # 7,828,503)
Features
- No tools required for size changeovers.
- Accommodates coil diameters from 6 mm to 50 mm without the need to change crimp heads.
- Min/Max binding edge 5.5" - 17" (14 cm - 43 cm)
- Easy to follow decals guide the operator through setup.
- Removable off-cut tray makes accumulation and disposal of off-cuts neat and tidy.
- Available with electric or pneumatic actuation.
- Foot pedal operated.
- Simple dial adjustments enable you to setup, cut and crimp coil diameters from 6 mm to 50 mm with the same crimping heads!
- Longer crimp achieved as the coil diameter increases reducing the risk of coil unwinding from the larger punch holes.
- Large top surface doubles as useable workspace.
- Easily integrated with most coil insertion equipment.
- Electric version - 110 V or 220 V Single phase
- Pneumatic version - Compressed air requirements: 80 psi @ 1 cfm
- CE Compliant
- Dimensions 28"W x 16"D x 12"H (71 cm x 41 cm x 30.5 cm)
- Weight - 40 lbs. (18 kgs)
 |
Step #1 - Set Coil Guides Adjust both the left and right coil guides to the coordinating diameter. This adjustment opens or closes the channel that guides the coil into the crimp heads. |
 |
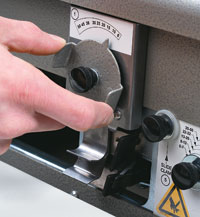
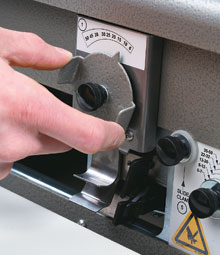
Step #2 - Set
Head Tilt Angles Loosen this thumb screw and slide it up or down to the coordinating diameter and re-tighten. This adjustment changes the angle of the cut & bend heads so that they can accommodate the various coil diameters. |
 |
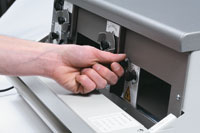
Step #3 - Set Table Height Lift and slide the front table to the appropriate coordinating diameter position. This provides the coil with sufficient room to fit into the crimp heads. The front table also provides support for the book being crimped. |
 |
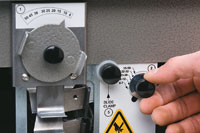
Step #4 - Set
Sidelay Position Loosen and slide the sidelay into position with the coordinating diameter marking and re-tighten. |
 |
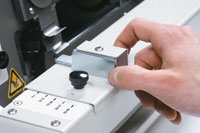
Step #5 - Set Right Side Cut/
Bend Slide Position With a bound book sample in position, loosen and slide the right cut/bend head into a position so that the head will be crimping the last loop of coil as it exits the book. Re-tighten in position. |
Longer crimp achieved as
coil diameter increases.
Simple dial adjustments to change from a 6 mm to a 50 mm coil.
Brochure PDF's | Equipment Videos | Company Profile | Global Partners | Tech Support | Contact Us | BindAmerica.com
385 DeBaets Street | Winnipeg, MB R2J 4J8
Toll Free Phone: 1-800-665-7884 | Toll Free Fax: 1-888-665-7884 | Email: [email protected]
© 2026 PLASTIKOIL®. All Rights Reserved. | Privacy Policy